Saturday, May 31, 2014

Refreshing Pineapple Cream Pie - So YUMMY!!

I decided that I was really in the mood for a pie.  I went to the pantry and started looking through to see what I could make into a tasty pie.  I found some cherry pie filling and thought ohhhhh I will make a cherry cheese pie, a family favorite. But alas, I did not have all the ingredients.  I started searching again and ended up kinda making up a recipe.

Here is what I used:
I envelope of DreamWhip
1/2 cup milk
1 8 oz. can of crushed pineapples
8 oz. cream cheese, softened
1 cup sugar
pinch of salt
graham cracker pie crust


Recipe:
1. Make the DreamWhip.  I made it according to package directions using 1/2 cup of cold milk and beat it on low for 4 minutes. Set aside.


2. Beat cream cheese and sugar until it is fluffy.

3. Mix in the pineapples and pinch of salt into the cream cheese mixture.


4.  Fold into the DreamWhip.


5. Pour into the crust.

6. Refrigerate for at least an hour but I find that longer helps it set better.


This is such a great summer dessert.  It is so easy to make!  And it is very refreshing on a hot summer day (even though it is technically still spring - it is already in the 90's here!)


Thursday, May 29, 2014

Family Vacation

We had a great road trip to Pennsylvania.  It was a long trip - a car trip that used to take Tim and I 10 hours now takes 14 hours with two kids.  Both of the kids did great.  Alex has been on lots of road trips across the country but this was Amelia's first big trip and she did great!

At our stop for breakfast.  Amelia enjoyed being out of her carseat for a while even though she slept most of the trip thus far.


Alex being silly at our breakfast stop.

We has so much fun visiting family and lots of fun visiting new places. One of the favorite places that we stopped was Longwood Botanical Gardens.  It was a beautiful day and lots of beautiful flowers to look at.  One of the favorite parts for the kids was the fountain garden where they could play in the water.


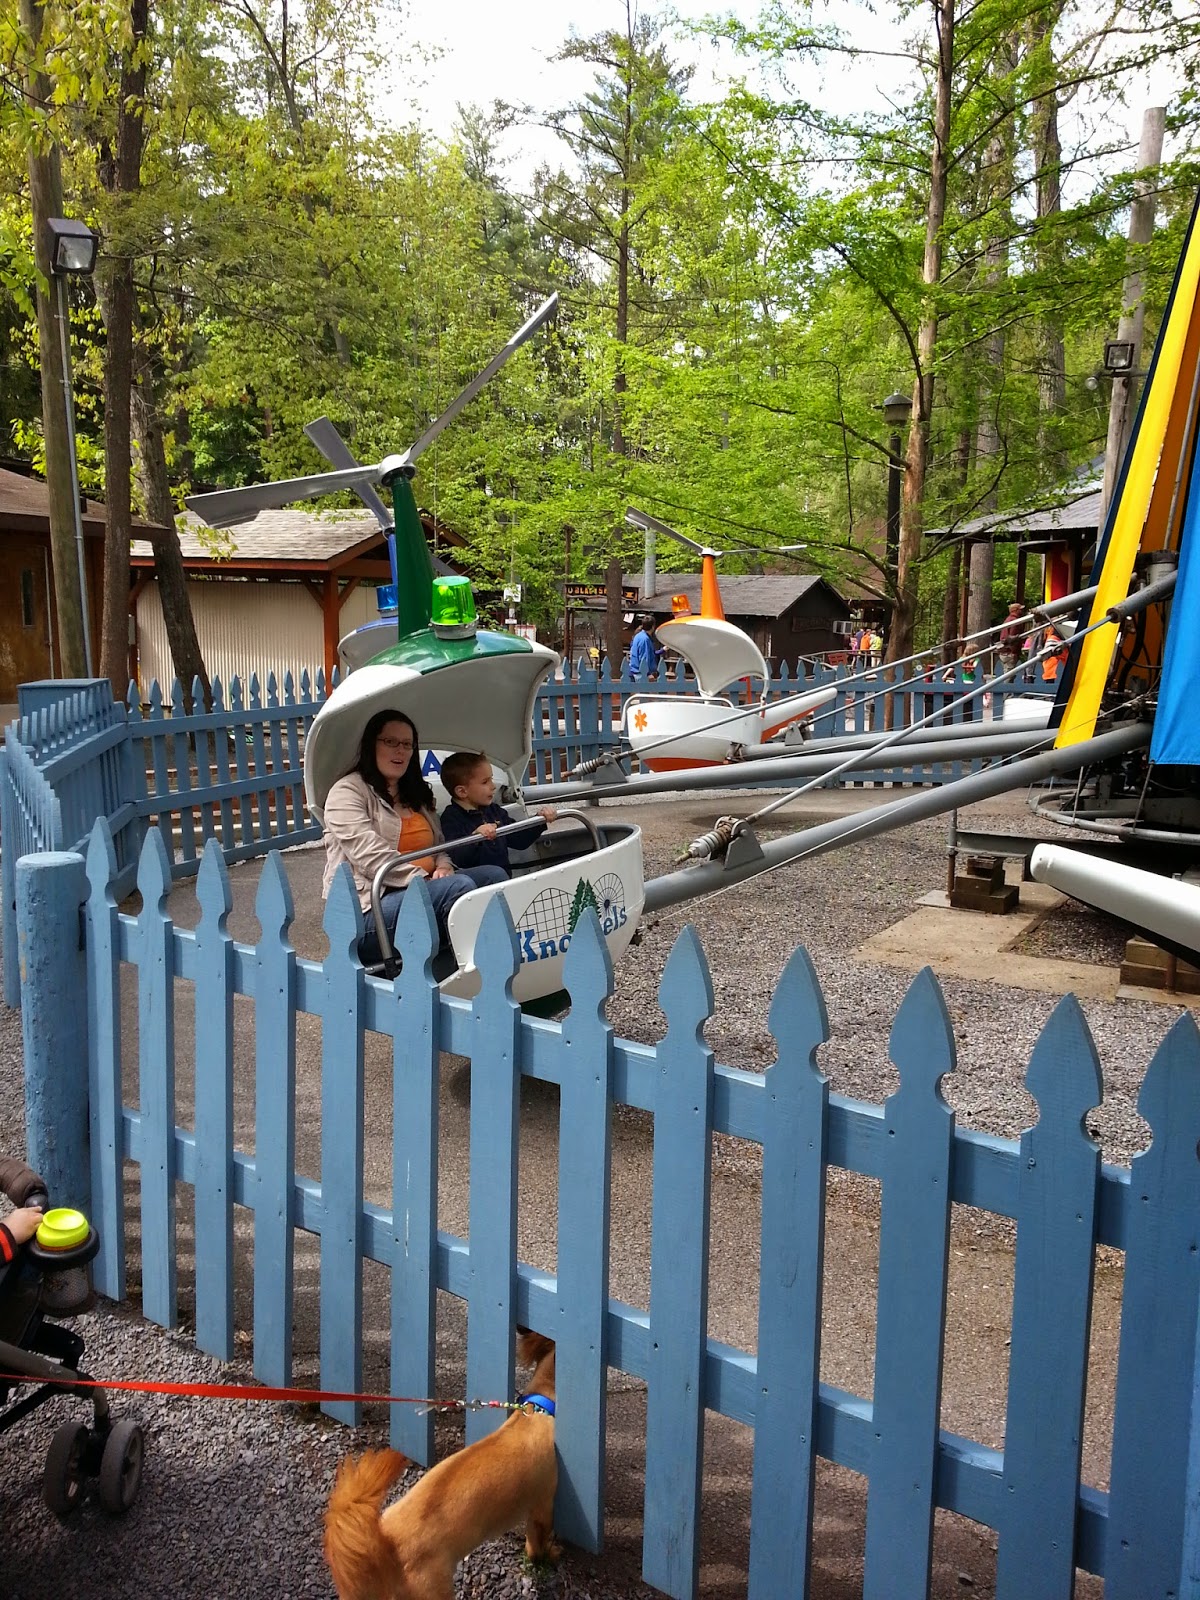
Alex's favorite place that we went was an amusement park.  This was his first time ever going to one and it was very exciting.  We did not know what to expect with him but he loved it and enjoyed riding all of the rides.


Alex and I riding the helicopters.

This is a giant slide inside a silo made to look like a rocket.  This was one of Alex's favorite rides!  After Alex and I rode down it together on the burlap sack, he wanted to do it by himself the next time.  He said that he wanted to go fast next time!


It was nice to have new adventures as a family!  We had so much fun and now we cannot wait until we get to do it again.  Family vacations are the best!

Wednesday, May 14, 2014

DIY Camera Strap - For the Photographer in your Life

Later this week, we will be leaving for vacation.  My hubby has been asking me to make him a camera strap for a while and I thought now is the perfect time to make one for him.  This one is made for someone with is tall, so feel free to adjust it to your height.  This one comes to the middle of my thighs since I am just barely over 5 foot, but perfect for Tim since his is over 6'3".  Here is how I created it.  

First, I chose my materials.  This is a scrap piece of fabric that I had on hand.  I needed it to be big enough to cut our two strips that were 6" x 27".  I also used my Fiskars cutter and board, matching thread, grograin ribbon, and two clips.  I needed small clips to fit his camera.  I found the ones that I used in the jewelry section at Joann's.  


I then measured and cut out two strips of material measure 6" x 27".  My cutting board is a little shy of 27" so I used a piece of paper to make sure it lined up all the way to the top so that I got a straight cut.  


Next, I cut off the selvage end of the fabric.


Next, comes the ironing.  You will want to fold the material in half long ways and iron a crease into the material.


Using the crease that you just made, fold each of the sides to that crease and iron down.


Next, fold both sides together to create a long, skinny strip. On each end, fold it in 1/4" to create a finished end once completed. This is part of your strap. You will need to repeat with the other strip of material.


Next, you will need to cut out to pieces of ribbon.  This is the kind that I just happened to have on hand.  I cut two strips 6" each.


Thread the ribbon through the clip.


I used a straight stitch to hold the ends of the ribbon together. Do this to each of the strips of ribbon.


Place the ribbon inside of the end of one of the strips, centering it when you do this. Sew the end of the strip down.  I used a zigzag stitch to make it secure.


You will also want to sew the other end shut and do a zigzag stitch all the way down the long side of the strip.


Place the end of the strip that you just completed inside the other strip just like you did the ribbon. Sew together using a zigzag stitch.


Sew in the other ribbon and hook into the other end of the strip that you just completed.


You now have a new camera strap.  Much cooler than the black ones that usually come with the camera.  And you can customize it to your height since we are not one size fits all.


Tuesday, May 13, 2014

DIY Fabric Trash Bag for Car

We are leaving for a car trip at the end of the week and one of the things that we always have to deal with on a long trip is the trash.  There is always something to throw away with two kids.  I am not great at remembering to bring plastic grocery bags so I decided to make a trash bag for the car.  I let Alex pick out the fabric so it is a red and black cotton with gold glitter.

You will only need about 3/4 of a yard of cotton fabric although I bought a yard just to be on the safe side.  I am always afraid of making a mistake as a create something new.

I always wash the fabric before I start any project.  This is important so that if there is any shrinkage, it will happen now not after your project is complete and ruin it.  There is nothing worse that working so hard on something just for it to get ruined.

I started by drawing the pattern onto tracing paper and and then cutting it out.  You can just measure on the fabric if you want.

Here are the pieces that I made:

Main Pocket - 16" x 9 1/4" - cut 2
Front Pocket - 10 1/4" x 9 1/4" - cut 1
Binding - 2 1/2" x 13 1/2" - cut 3
Short Strap - 8" x 4 1/4" - cut 1
Long Strap - 16" x 4 1/4" - cut 1

You will also need a parachute clip and matching thread.

After I got all the pattern cut out, I pinned it to the fabric and made my cuts.


I began by making the straps.  I took the short strap and ironed it.  I folded in long ways and ironed a crease in it.  I then folded the long sides into the middle and ironed it down.  Finally, I folded those into those in to make a this strap. Fold the short ends in 1/4" to finish the ends. I repeated the process with the long strap.
Once you have the straps folded and ironed, you will need to sew the open three sides together on the long and short strap.

You will need to thread the short strap through the female end of the parachute clip.  Once it is threaded through, you will need to have at least 1 1/2" pulled through.  To secure the clip to the strap, you will need to sew a box stitch.  Sew the strip down by sewing a square and then an X in the middle.  It will look like this when you have the box stitch completed.  Repeat with the male side of the parachute clip and the long strap.

Next, you will need to make the binding to finish the edges of the pockets.  Fold the binding in half long ways and iron.  Unfold.  Fold the long edges to the middle crease.  Iron.  Fold both of the flaps you just created to make a long skinny strap.  Iron to make flat.  Sew the long edge together, but leave the ends open.

Now you will need to sew the binding to the top of the pockets to finish the top edge.  Place the top of edge of both main pockets and front pocket inside of each binding strip.  You will sew the pockets inside each of the bindings one at a time.  The top edge is the shorter end of the pockets.


Once you have the top edge of each of the pockets finished, it is time to assemble the bag.  Lay one of the main pockets right side up.  Place the front pocket right side up on top of the main pocket, lining up the bottom edges.  Place the second main pocket on top of the other two right side down.  Pin the two sides and bottom so that they will not shift as you sew them together.   Leave top open.  At the top of each side, I used a zig zag stitch to make sure that it is secure and not come apart as it is used.


Before turning the bag  right side out, I sewed the strap to the bag using a box stitch.  I sewed one side of the strap near one side seam and the other side of the strap to the opposite side of the bag.  Trim the excess binding,


Now all that is left is to turn it right side out and you have a nice trash bag to hang in your car.




Sunday, May 11, 2014

Create a Homemade Bib for an Older Family Member or Friend

My grandmother is in her 80's and my parents asked if I could make her something like a bib to help when she eats.  I told them that I could and went for a search on the internet.  The best and easiest one that I found was on a site called maiden jane.  It included a great pattern and instructions. I have made her several since I found this site and they are pretty quick and simple to make.  This is the most recent one that I have made.  These are great for those in nursing homes or assisted living, or like my grandmother that lives at home with a day nurse and my family at night.  This is a great gift that you can use any fabric pattern for it - whatever you like.  I use just a cotton fabric - like a good quality fabric.  I want it to be durable since they are worn at every meal and washed a lot.  I have never made a lining for the ones that I make but the instructions at the following site will give the directions for how to line it if you want.

http://www.maidenjane.blogspot.com/p/tutorials_17.html

You will need to scroll down to find the pattern.

Here is what I do.  You will need 1 1/2 yard of fabric, sew on velcro, and matching thread.

Since I have made this bib several times, I already have the pattern printed, cut out, and taped together but if this is your first time making it you will need to do this.

1. I place the pattern in the fold of the fabric.  Make sure that you follow the grain correctly.  I pin the pattern to the fabric before I cut it.  There is nothing worse than a pattern moving as you cut the fabric.

2. I cut the fabric to start to create the bib.  Here is what it looks like once it is cut out.


3. I pin a 1/2 inch seam allowance around the entire bib.


4. I sew the seam down around the entire bib.

5. I finish the bib by sewing on velcro so that it is easily put on and taken off.  Do not use the velcro that is sticky.  You will need the kind that you sew on.  It will last.


This is the final product.  It is a TN Vols pattern since we are a family of Vols lovers!